We will use the newest 4.4 version of OpenDX in the lab. You
have to start with the binary executable /opt/local/bin/dx which will require to put in the bash shell paths export DXROOT=/opt/local/dx and export PATH=$PATH:/opt/local/dx/bin . The
simpest way to do this is to add the two paths to your shell $PATH variable within some .bashrc startup file. If you were successful,
and you ran first source .bashrc and rehash, the next time
issuing dx will bring up
OpenDX in version 4.4.
Useful tutorial sessions of OpenDX can be found at these recommended links:
OpenDx tutorial 1 recommended
OpenDx tutorial 2 for complex tasks
The gzipped package glyphData.tar.gz has a .net file and a data file in spreadsheet format to illustrate the simultaneous control of glyph color and size. This would have to be combined with animation and movie making in a full simulation.
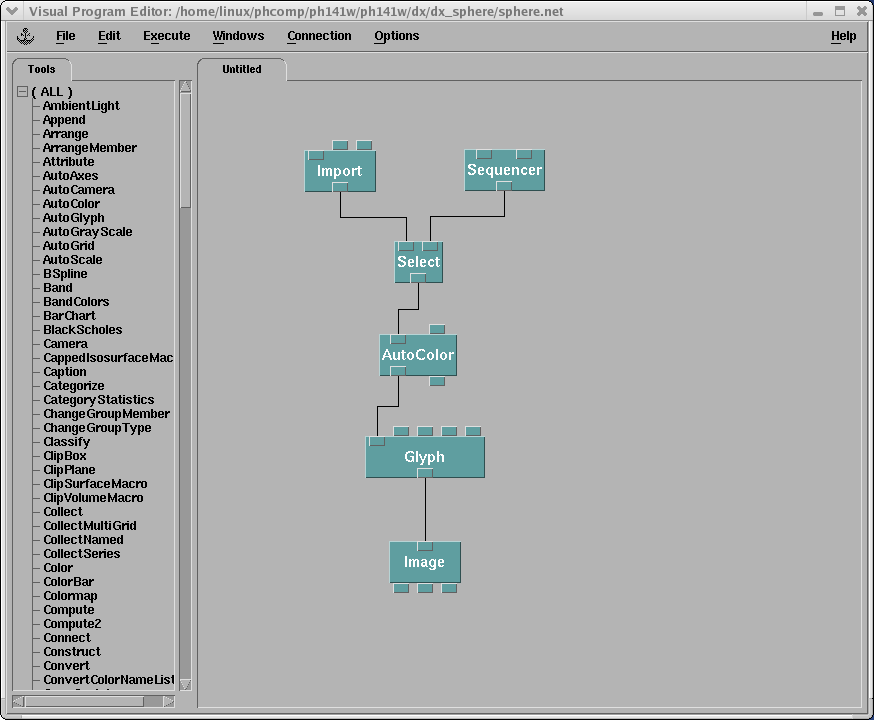
We want to open a new visual editor in DX in client-server mode: dx .
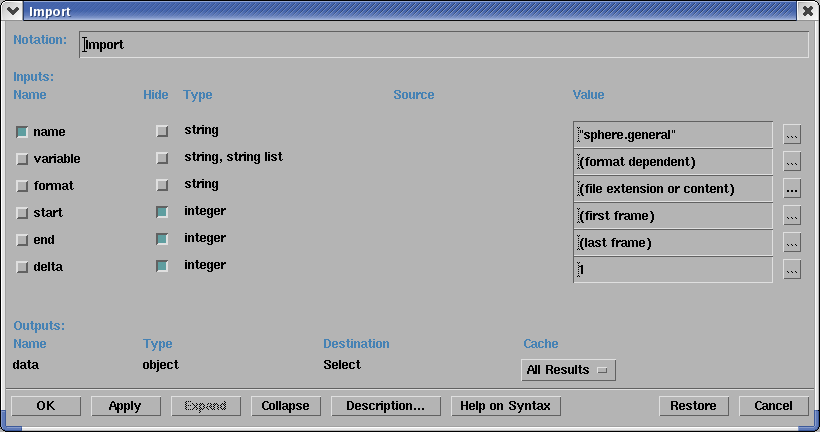
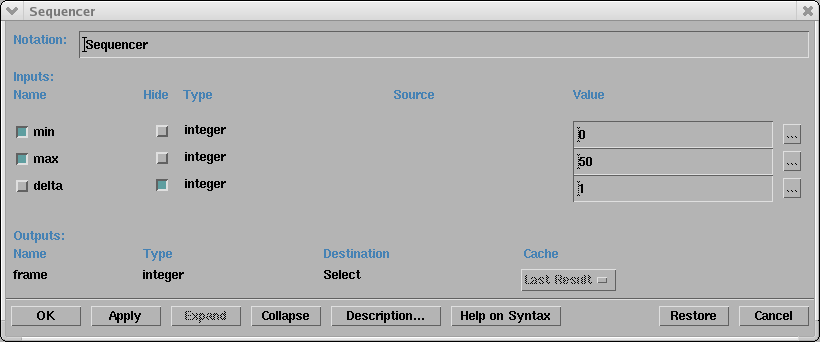
Now put on the canvas the modules with connections which will look like this. We will work with the data file sphere.data which has 51 frames with 2,000 mass points for each frame. The data file was generated with the Aarseth code and describes the gravitaional collapse of a spherical mass point distribution uniformly and randomly filling the sphere of unit radius with zero starting velocities. We have to bring in the data into DX which is controlled by sphere.general which communicates the arrangement of the data to DX. This requires to reprogram module Import as shown in the figure. We also have to reprogram the Sequencer module. The other modules do not require any reprogramming for a start. This allows us to run the animation but the visual display will show large glyphs. This can be modified later by reprogramming the Glyph module. This setup can be used with easy adaptation for any animation of data files generated by N-body simulations. Full code: sphere.net
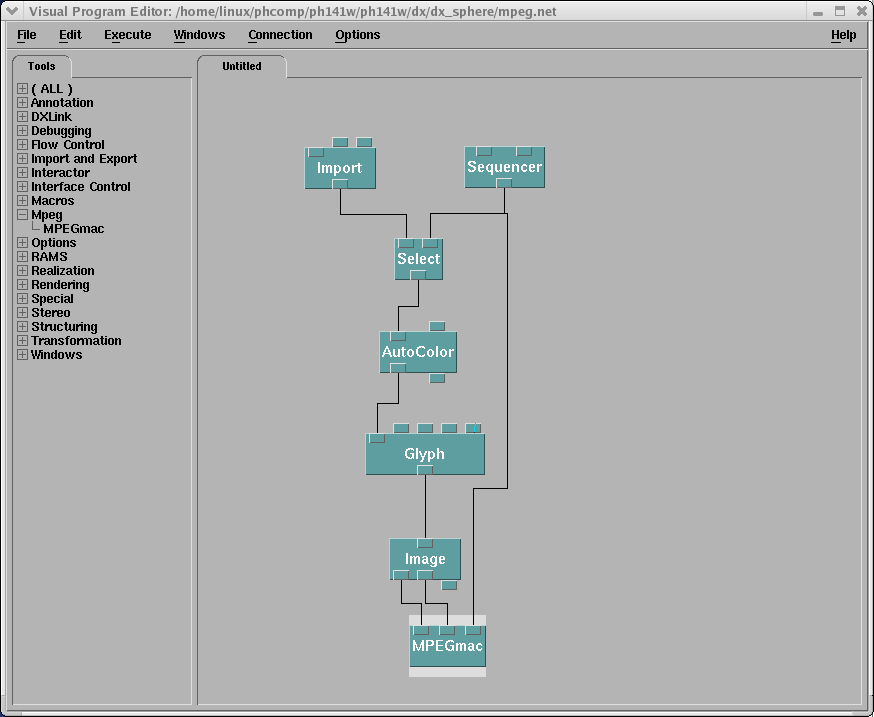
We have to load into the Visual Program Editor the MPEGmac.net macro module, put it on the canvas and make the connections with the Image and Sequencer modules. The canvas will look like this. No further reprogramming of the modules is required. Running the visual program will run the animation now and generate a YUV file for each frame with another file containing the size information in pixels. After a full run, 51 YUV images are created which can be encoded into the mpeg movie using mpeg_encode as described here here.